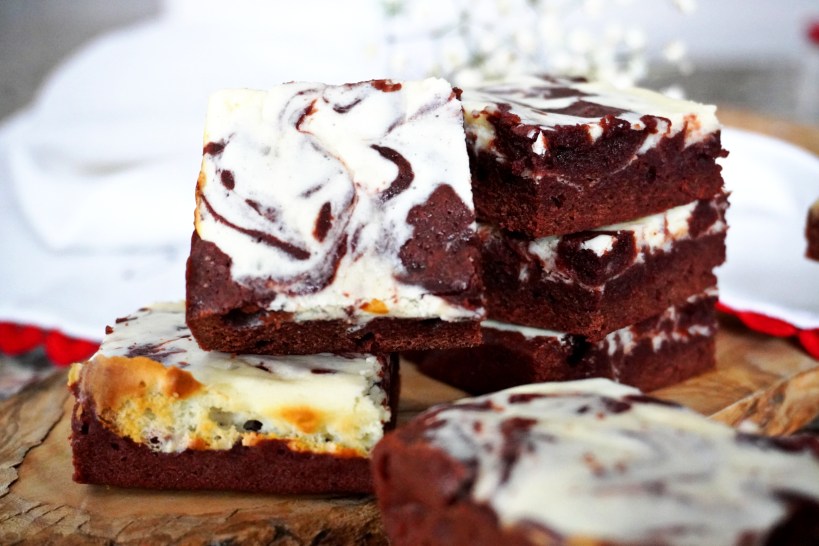
Red Velvet Cheesecake BROWNIE Bites
This will probably be the only recipe I will be making for Valentine's Day so listen up real good.
The lie detector concluded: that was a lie. 😁
Let's get into it.

INGREDIENTS:
RED VELVET LAYER
- 1 stick of unsalted butter, room temperature
- 4 tbsp unsweetened cocoa powder
- 2 pinches of salt
- 3/4 cups of sugar
- 2 eggs
- 1 tsp vanilla extract
- 12-15 drops of red food coloring*
- 1 cup of all purpose flour, sifted
*be careful with the food coloring. Don't put too much or it will alter the taste.
CHEESECAKE LAYER
- 3/4 block of cream cheese, room temp
- 1/4 cup of sugar
- 1 tsp vanilla extract
- 1 small egg
DIRECTIONS:
- Preheat your oven to 350 degrees Fahrenheit.
- Line an 8x8 pan with parchment paper and set it aside.
- In a medium microwave safe bowl add the room temp butter, cocoa powder and salt. Microwave for 15 sec and stir. If it's all melted, move on to the next step. If it is not, microwave another 10-15 seconds.
- Once it's all melted, add the sugar and mix to combine.
- Now add the eggs and vanilla and whisk them in slowly until fully incorporated.
- Start adding your red food coloring until you reach the desired color. I used about 15 small drops. Mix well.
- Slowly sift in your flour and with a rubber spatula, fold it in until it's all mixed and starts looking like a red velvet brownie batter.
- Take about 1/3 of the batter and set it aside while the rest of the batter can be poured into the pan with parchment paper and even it out.
- Let's make the cheesecake layer.
- In a standalone mixer, add your cream cheese + sugar and mix on medium speed.
- Scrape the sides and add the egg + vanilla and whisk again for another minute or two.
- Now take about a spoonful and drop it randomly all over the brownie batter. Followed by the left over brownie batter you set aside earlier and repeat until there is no more cheesecake or batter left.
- With a butter knife or wooden skewer, swirl the batter around and make any pattern you like. But don't overmix. You want to be able to see the layers after it bakes.
- Bake for about 25 minutes and let it cool down completely before cutting and serving.
- Enjoy.


So, what do you think? Will you make it?
Ignore the amount of steps, it's easier than it looks. Trust me. Besides, it tastes phenomenal and that alone is worth it.
Until next time, you can't social distance from chocolate!
x, Dijana

These look amazing!
It looks delicious!